
If you are new to custom content or mods, learning how to install Sims 4 CC and mods can feel confusing at first. The good news is that the process is actually very simple once you know where the files go and how to enable them in-game. This guide walks you through everything step by step, using clear examples and tips that work in 2025.
Installing mods and custom content (CC) in The Sims 4 can greatly enhance your gaming experience by adding new features, items, and customization options.
Here’s a clear, easy-to-follow guide to installing mods and CC in The Sims 4:
Choose Mods/CC:
- Browse through the available mods and CC to find the ones you like.
Organize Your Downloads:
- Create a folder on your computer specifically for Sims 4 mods and CC.
Extract Files (If Necessary):
- Some mods and CC may come in compressed file formats like .zip or .rar. Extract these files using a program like WinRAR or 7-Zip.
Install Mods:
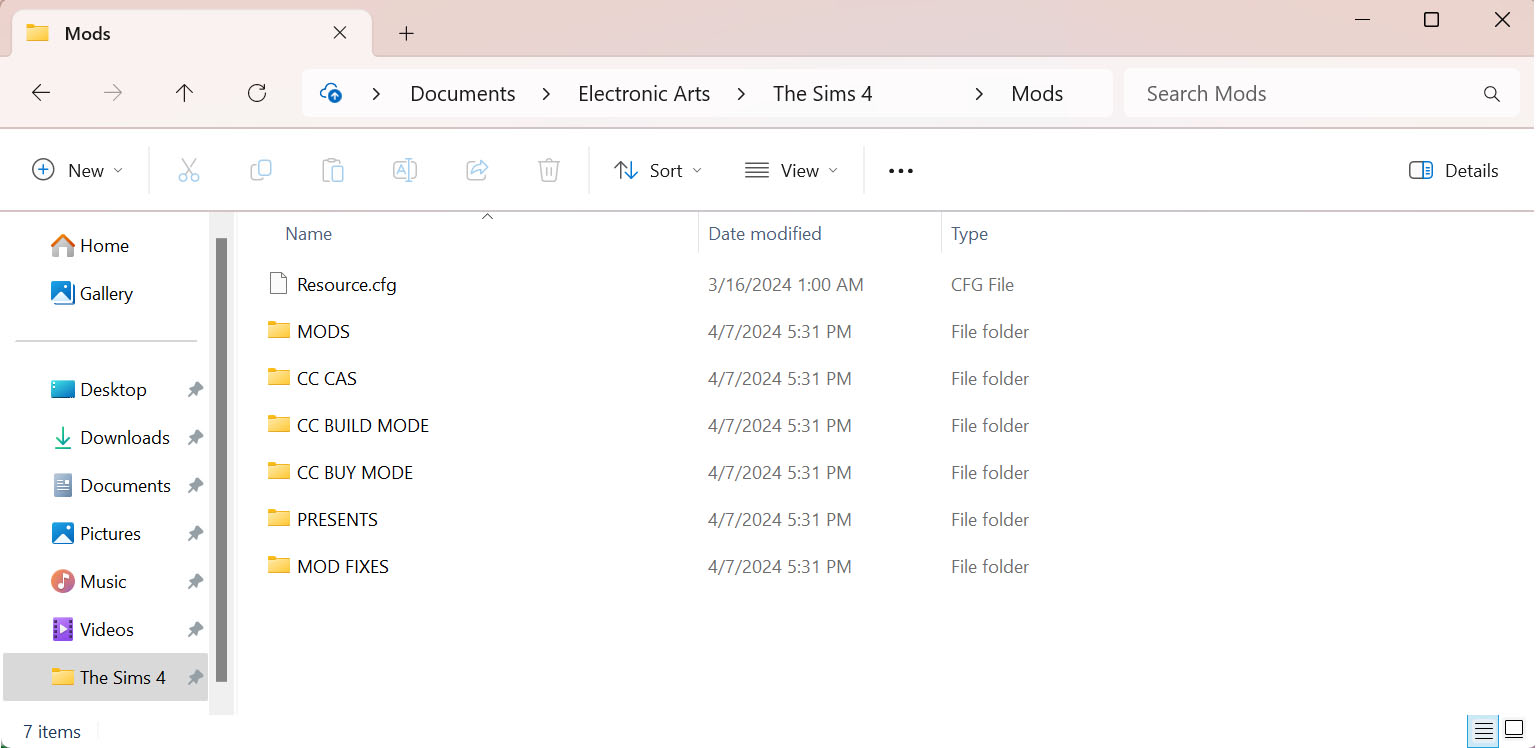
- Move .package files into your Sims 4 Mods folder, typically located in Documents/Electronic Arts/The Sims 4 directory.
Install CC:
- Place .package files directly into the Mods folder.
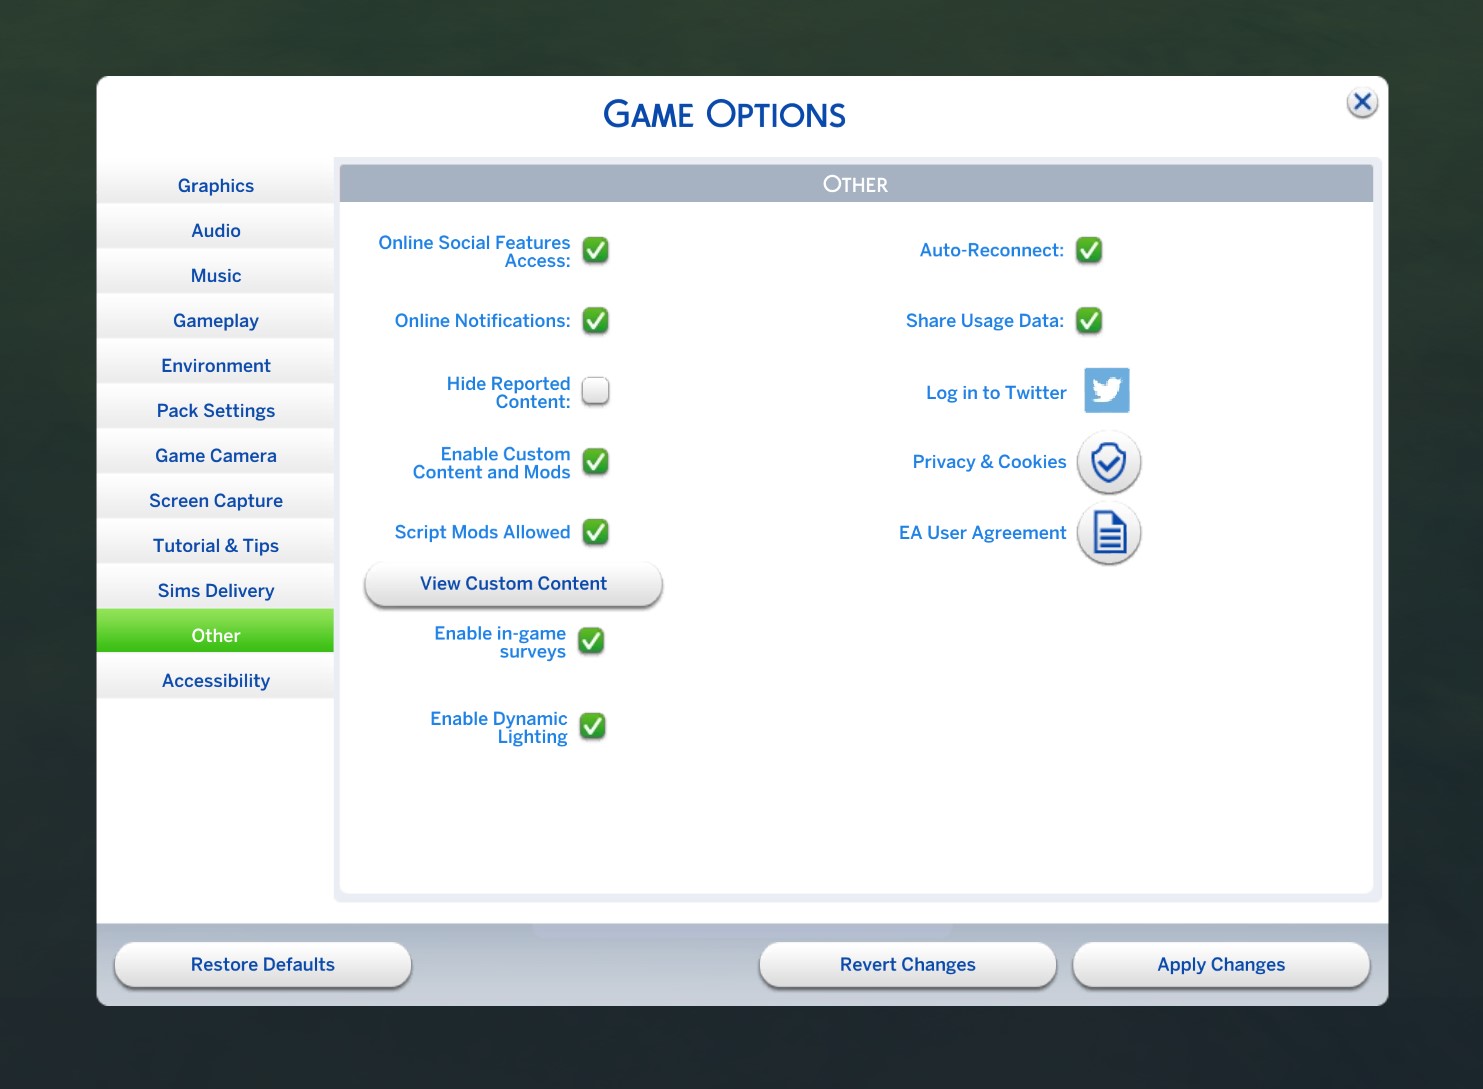
Enable Mods/CC in Game:
- Launch The Sims 4, go to Game Options > Other, and check “Enable Custom Content and Mods” and “Script Mods Allowed.” Restart the game for changes to take effect.
Verify Installation:
- Check for new items in appropriate categories or test modded gameplay features to ensure everything is working correctly.
Manage Your Mods/CC:
- Regularly clean out unused items and update mods to avoid conflicts and ensure optimal performance.
Important Notes:
- Download mods and CC from reputable sources to avoid malicious files.
- Be cautious with large amounts of mods/CC, as they can slow down your game or cause conflicts.
- Back up your Sims 4 saves and files regularly, especially before installing new mods or CC.
- Using mods and CC is at your own risk; exercise caution and discretion.
- If you want to report a bug, do it directly on the official EA forums.
Are you having problems with cc in your game? Check out this troubleshooting guide.
FAQs About Sims 4 CC and Mods
Q1: What are CC and mods in The Sims 4?
CC, short for custom content, usually adds new visual items like furniture, clothes, and hairstyles. Mods change or expand gameplay by adding new features, systems, or fixes created by the community.
Q2: Where do I install CC and mods in The Sims 4?
All CC and mods go into the Mods folder located at Documents > Electronic Arts > The Sims 4 > Mods. The game will not detect files placed anywhere else.
Q3: Do I need to extract files before installing them?
Yes. If the download comes as a ZIP or RAR file, you must extract it first. The game can only read extracted .package and .ts4script files.
Q4: Why is my CC or mod not showing up in the game?
This usually happens if mods are not enabled in Game Options, files are placed too deep in folders, or the content is outdated after a patch. Restarting the game after enabling mods is also required.
Q5: Do mods break after Sims 4 updates?
Gameplay and script mods often need updates after patches. Build and Buy CC usually works fine, but it is still recommended to test your game after every update.
Q6: Can I play The Sims 4 without mods installed?
Yes. You can remove your Mods folder at any time and play the base game normally. This is also helpful for troubleshooting issues.
Q7: Is it safe to download Sims 4 CC and mods?
It is safe when downloading from trusted creators and well-known community sites. Avoid pages that reupload content without permission or use suspicious download links.
Q8: Do mods disable achievements in The Sims 4?
No. Achievements remain enabled even when using CC and mods.
Q9: Can I remove CC without breaking my save file?
Yes. Removing CC will not corrupt your save, but Sims may appear with missing items or default replacements if they were using that content.
Q10: Why does The Sims 4 disable mods after updates?
After most patches, the game automatically turns mods off to prevent crashes. You just need to re-enable them in Game Options.
 Stay connected with me on social media:
 Instagram, Bluesky, Tiktok, X, etc: @sixamcc
 Use my EA Creator Code SIXAMCC when purchasing EA titles to support my work at no extra cost. Thank you so much for your support!